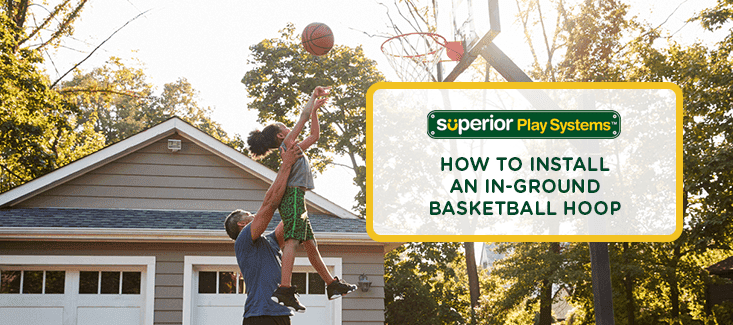
If you and your family love basketball, you may be dreaming of having your own hoop right in your yard. There are several different types of basketball hoops available, but an in-ground system offers the most stability and professional-level play. Here’s everything you need to know when shopping around for a basketball hoop, how to install a basketball hoop, and why you should consider professional installation.
Factors to Consider When Buying a Basketball Hoop
When you’re looking to buy a basketball hoop for your home, there are many things to consider, including where you’ll install your basketball hoop and what type you’ll need. A basketball hoop can be a big purchase and a big decision for your property, so you’ll want to make sure you get the best kind for your family and install it in the best location. Here are some of the most important things to think about before you buy your basketball hoop:
1. Choosing a Seller
An
in-ground basketball hoop is a large purchase, so you’ll want to make sure you choose the right seller. The best sellers are those that offer post-purchase support such as installation and customer care. Superior Play Systems® is the safest and most trusted name in play and offers high-quality in-ground systems from PROformance Hoops®. When you
purchase your basketball hoop from us, we’ll work with you to provide a seamless installation process that gets your family on the court in no time.
2. Location
One of the most important factors to consider is selecting the location for your new basketball hoop. The most popular choice for a basketball hoop placement is in a driveway, but you should make sure that you have a level driveway, as it’s much harder to play when the driveway is on an incline. If you have a larger backyard and enough room in the budget, you may want to consider a dedicated area or even a full-size basketball court. Just be sure that you have a patio or paved area — a basketball just doesn’t bounce in the grass. The hoop should not be hanging over the street to keep players safe. It’s also a good idea to check for any local and neighborhood ordinances or homeowner’s association rules for any restrictions on basketball hoop installation or placement.
3. Backboard Size
The size of the backboard on a basketball hoop can affect the shot opportunities into the hoop, and generally bigger is better here. However, you’ll want to think about the size of your driveway or the place where you are installing the hoop. In a small driveway, a too-large backboard can overwhelm the space, or look out of place. Consider also the level of professionalism you want — if you have a child with aspirations for professional basketball, a 72-inch backboard is regulation size, and would give the best practice for real basketball courts. However, a larger backboard is more expensive and may not be necessary if the hoop’s main purpose is for family recreation.
4. Height
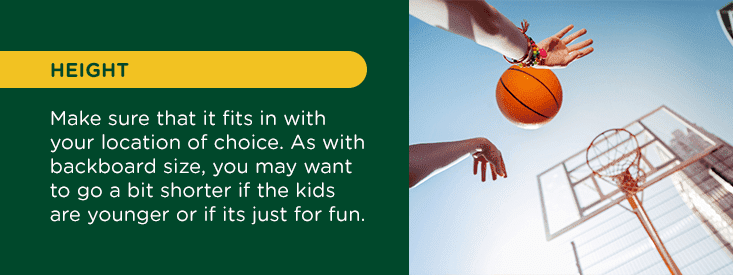
You’ll want to think about the height of the basketball hoop before you install it, making sure that it fits in with your location of choice. Professional regulation height is 10 feet for a basketball hoop, but just as with backboard size, you may want to go with an adjustable hoop or a shorter hoop if it’s just for fun. You can also check out hoops with adjustable height so it can grow along with your kids. Also consider the size of the overhang — the distance between the pole and the backboard, making sure to have about 2.5 to 4 feet of overhang available.
5. Type of Pole
Selecting a pole for your basketball hoop may seem simple, but there are actually many choices available. Poles come in both round and square shapes, in sizes between 4 and 6 inches, and either as a single-piece or a multi-piece system. Poles are generally made of metal and are either painted or have a powder coating.
6. Net and Rim
Standard basketball setups have an 18-inch diameter rim, with hooks to attach the net. There are two main types of rims available for home basketball hoops — static and breakaway. A static rim stays in place without moving and is a great option for beginners or as a more economical choice, but it should not be used for dunking. If you anticipate some slam dunks on your home setup, a breakaway rim is the best choice. These rims include special springs that flex and absorb the force of the dunk. This protects the safety of the player, as well as the longevity of your basketball setup.
Once you’ve considered all of the options available for your basketball hoop, you can decide what is best for your family and your location. Next, it’s time to purchase the basketball hoop setup and install it in your yard.
How to Install a Basketball Hoop In-Ground
You’ve done your research and found the right basketball hoop for your family — now it’s time for the exciting part! Installing your basketball hoop can be a lot of work, but here, we will lay out all of the steps involved. You’ll have your own basketball hoop up in no time and ready for the whole family to shoot some hoops! Consider this your step-by-step basketball hoop installation guide:
Step 1: Choose Your Location and Call Before You Dig
As mentioned in the section on things to consider, one of the most important steps in the basketball hoop installation process is choosing the right location. You may have already picked the location where you want your basketball hoop, but since you’ll need to dig a hole, it is a must that you
Call Before You Dig (dial 811) to check for any utility lines. Ask your Superior Play System for more info.
Be sure that you’ve checked with any neighborhood ordinances or homeowner’s association rules on the placement of your in-ground basketball hoop on your property. You should also read all the instructions and check for any manufacturer recommendations for your particular model before you start digging.
Step 2: Dig a Hole
You’ll need to dig a hole where the pole for the basketball hoop will be located. Check with your manufacturer and your specific model for recommendations on how to dig the hole, and how big it should be. You can dig by hand with a shovel, or use an auger or other digging equipment. See the owner’s manual for specific instructions.
Step 3: Pour the Concrete
Once you’ve dug the hole, you’ll secure the basketball hoop pole in the ground with poured concrete. Some models simply have a single pole that you pour the concrete around. If this is the case, have someone — or two people — hold the pole level while another pours the concrete around it. More commonly, there is a rebar-mounted anchor that you’ll set into the concrete after it’s been poured. Either way, as you’re pouring the concrete, make sure to regularly agitate it with a shovel to remove any pockets of air.
To finish off, smooth out the top of the concrete with a trowel, and make sure everything is level. Clean off any excess with a damp towel or sponge. Now, you’ll have to leave the cement to dry for at least 24 to 48 hours. For the first few hours, keep checking the cement to make sure that the pole hasn’t shifted and isn’t leaning. Correct the pole if necessary and keep re-checking until the cement has hardened. Wait on the rest of the assembly until the cement has dried and hardened completely.
Step 4: Raise the Pole
If your basketball hoop setup is simply a pole in the cement, you can skip ahead to the backboard. But if your setup includes a mounting anchor, it’s time to assemble and raise the pole. Each model is a little different, so be sure to follow the directions for your specific unit. If you have an adjustable height type of basketball hoop, you’ll assemble the lift mechanism and support arms according to the directions.
The post will likely be very heavy and may require a few people to lift it into place. Take any necessary safety precautions, and have your team lift up the pole so that it matches up with the anchor piece in the cement. Make sure that the post is level, and use the bolts to secure it into place. Leveling nuts should also be a part of the setup — adjust these as necessary to make the pole completely level.
Step 5: Attach the Backboard
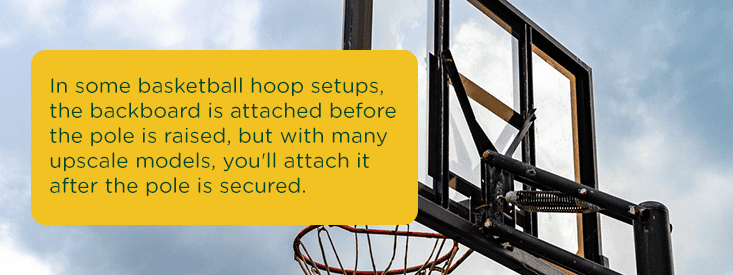
In some basketball hoop setups, the backboard is attached before the pole is raised, but with many upscale models, you’ll attach it after the pole is secured. Note that the backboard is also generally very heavy, and it may take several people working together to lift it up and get it installed. Make sure you have a few extra helpers around and take precautions for safe lifting.
Have several of your helpers lift the backboard up in place to the support arms, while another person secures it to the support mount. Each model is different, but there may be other support arms or cross braces to attach at this point. Follow the directions to get all of the right parts securely in place.
Step 6: Install the Rim and Net
When the backboard is fully attached, it’s time to add the basketball rim and net. The rim will simply get bolted to the backboard in place. If you’ve opted for a breakaway rim, there may be some extra assembly required. With the rim attached, you can then loop the net around each of the hooks on the rim to have your net fully installed.
Step 7: Finishing Touches
By this point, your basketball hoop is almost ready to play! There are just a few extra steps to fully finish and customize your setup, some of which are optional. Some upscale models have extra padding that you can attach around the corners of the backboard, and around the pole. These are generally optional touches, but can ultimately protect the safety of any players, preventing bumps and bruises, or other injuries when accidentally bumping into the basketball hoop.
If you have an adjustable height basketball hoop, you can now adjust to the desired height for your family. It may be necessary first to place it at the regulation 10 feet so that you can mark the height on the pole or use the provided height stickers. Measure the height of the rim to check for accuracy. Now it’s ready to adjust to whatever height you want to use — with the height stickers, it’s easy to see at a glance where to adjust the mechanism.
If you have any additional
accessories, such as court lighting, now is the time to install these. Follow the manufacturer’s instructions for any accessories to get them installed properly. Depending on the size of the area where you install your hoop, you may want to paint court lines on the pavement. This is totally optional, but if you choose to paint lines, pressure wash the area first to ensure you have a clean surface for the paint to adhere to. Measure out where the lines need to be and mark them off with painter’s tape. Paint in your lines and remove the tape. Now you’re truly ready with your very own basketball court! Gather up the family and get ready to play!
Why Should You Have a Professional Install Your Basketball Hoop?
If following these basketball hoop installation tips and steps has your head spinning, you’re not alone. Even in today’s DIY culture, installing a basketball hoop yourself can be a bit involved. If you decide that installing the system yourself is just a little too much, why not let the professionals handle it? With professional installation, you’ll save yourself a lot of time and hassle.
Consider the amount of time necessary to complete the installation process yourself. Even if you follow every direction exactly, the process still involves at least two days of work. And any delays in the process or simple mistakes can drag it out even longer. Even the research and preparation work can take more time than expected.
Installing an in-ground basketball hoop can also take a lot of tools and specialized equipment. Digging a hole large enough for the basketball hoop post is not easy to do by hand, and if you don’t have an auger or backhoe, you may need to rent equipment to complete the task. This can add time and expense to the project. Consider also the fact that you will need extra adults around to help. Raising the heavy pole and lifting up the backboard require at least three to five adults, so you’ll need to convince family, friends or neighbors to help out, possibly spending money on food and drinks to feed and thank your crew.
Attempting a project of this scale can lead to a lot of aggravation, especially if you lack the proper tools or underestimate the amount of time and effort necessary to complete the project. Even when everything goes right, the amount of time and effort required for a project of this scale can simply be frustrating.
Having a basketball hoop in your yard should be about fun, not frustration. And having a professional install your hoop means you can get to the fun part much faster. When you buy your basketball hoop from Superior Play Systems®, you get some of the best equipment on the market as well as white-glove installation services. The experience and expertise of the professionals mean they can get the job done faster and easier than you could on your own, and you know it will be done correctly the first time.
Choose Superior Play Systems® for Your Basketball Hoop Installation
If you’re shopping around for a basketball hoop for your family, come to Superior Play Systems® and experience the best in expertise and customer service. Our experts can help you every step of the way, from selecting the right equipment for your needs to scheduling professional white-glove installation services. To get started,
contact Superior Play Systems® today — we can answer any of your questions and help you find the right basketball hoop for your family. Shop our equipment online or use our search tool to
find the closest showroom where you live. Come experience our top-quality equipment and superior customer service in person!
Related Article

 You’ll want to think about the height of the basketball hoop before you install it, making sure that it fits in with your location of choice. Professional regulation height is 10 feet for a basketball hoop, but just as with backboard size, you may want to go with an adjustable hoop or a shorter hoop if it’s just for fun. You can also check out hoops with adjustable height so it can grow along with your kids. Also consider the size of the overhang — the distance between the pole and the backboard, making sure to have about 2.5 to 4 feet of overhang available.
 You’ve done your research and found the right basketball hoop for your family — now it’s time for the exciting part! Installing your basketball hoop can be a lot of work, but here, we will lay out all of the steps involved. You’ll have your own basketball hoop up in no time and ready for the whole family to shoot some hoops! Consider this your step-by-step basketball hoop installation guide:
 Have several of your helpers lift the backboard up in place to the support arms, while another person secures it to the support mount. Each model is different, but there may be other support arms or cross braces to attach at this point. Follow the directions to get all of the right parts securely in place.


