Playground Planning Guide: The Ultimate Playground Checklist
Playground Planning Guide: The Ultimate Playground Checklist
Have you decided to build or revamp a playground? If so, you’ll be doing an immense favor for the kids in your community. Playgrounds enable children to get the exercise and stimulation they need to develop essential skills and maintain good health. Every kid deserves to play and have fun outdoors, and a safe, well-designed playground gives them that chance.
Every fantastic playground begins with a step-by-step plan. We put together this ultimate guide to planning a playground so you can start your project with confidence. Whether you manage a school, daycare or community park, we’ll show you how to plan a playground in 10 practical steps.
Step 1: Envision Your Playground
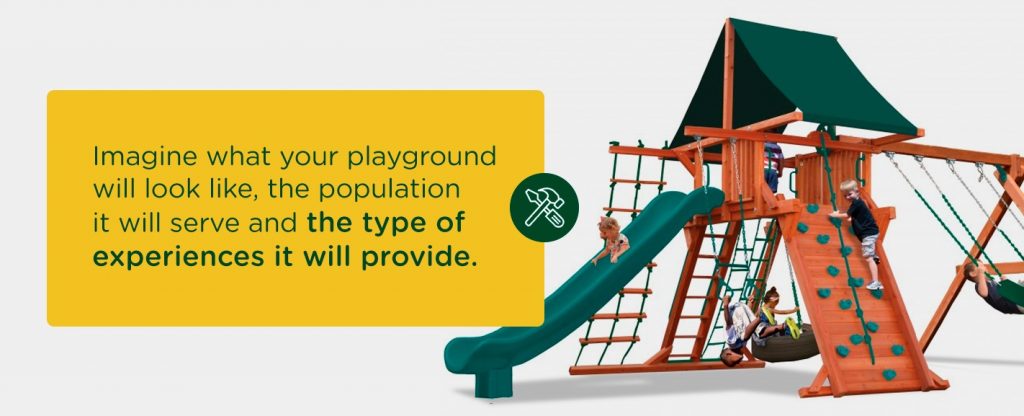
Most great creations start with a vision. Imagine what your playground will look like, the population it will serve and the type of experiences it will provide. Ask yourself the following questions:
- How old will the playground users be? Different age groups have unique needs regarding safety and development. Ideally, your playground will offer various challenge levels to help kids grow and have fun along the way. You’ll want to choose playground equipment that’s an appropriate size and also stimulating. You can build an all-ages playground, but you’ll need to create different zones marked with signs and separated by buffers to keep kids safe. Generally, playgrounds are divided into three different age groups: toddlers, preschoolers and school-aged children.
- How many children will be using your playground at once? Consider how busy your playground will get and how to accommodate each child so they can play comfortably. You want to avoid having a crowded playground or a lack of equipment. Make sure you have adequate space for the amount of playground equipment you need to keep kids playing happily. Knowing how much traffic your playground will get will help you imagine its size.
- Do you wish to use a theme? Think about any potential themes or color schemes you might like to include in your playground, as this can help you choose the overall design. For example, if you’re creating a playground for a school, you may wish to incorporate the school’s colors. Or maybe you’re planning to build a playground near a wooded area and want to use nature as your inspiration.
- What are your goals? What do you wish to accomplish by building a playground? Are you hoping to create a family-friendly space that also includes fitness equipment for adults? Are you aiming to make an exciting and inclusive playground that brings the people in your community together? Keep your goals in mind throughout the planning process to help you stay focused.
- How much time do you have? You may not have years to complete your playground project, so it can help to create a timeline and keep yourself on track. For example, if you need to have the playground ready by the spring, you’ll want to start planning in the fall to give yourself enough time to make the best decisions possible. According to PTO Today, a typical playground project lasts six to nine months, not including the time it takes for fundraising.
- How will your playground be accessible and inclusive? Don’t forget to consider accessibility when planning your new playground. According to the Americans with Disabilities Act (ADA), newly designed or constructed play areas must meet certain accessibility guidelines. For example, according to the ADA, at least one of each type of ground-level play component in the playground must be on an accessible route. You’ll also want to think about ways to make your playground inclusive, so kids of all abilities can play together.
Step 2: Determine Your Budget
After you have a clearer picture of your dream playground, it’s time to figure out your budget. The playground equipment is typically the largest portion of the costs. However, you’ll also need funds for the following elements:
- Site preparation
- Playground surfacing
- Amenities such as shade structures and drinking fountains
- Installation fees
If you don’t have all the funds you need, know that there still are plenty of ways to pay for your playground. You might start a fundraising campaign, apply for grants or look into financing options. If you would like to learn more about playground pricing, feel free to contact us at Superior Play Systems®.
Step 3: Assess Your Site
You’ll need to evaluate the location of the proposed playground, and consider factors such as:
- Size: Besides having enough room for kids to play safely, you also need to make sure there are at least six feet between play equipment and other structures. Swings and slides require even more space, so visitors don’t have to worry about bumping into obstacles.
- Drainage: Ideally, you’ll want water to drain away from the site rather than form puddles in the play area. However, you also don’t want loose-fill surfacing to wash away during a storm. Consider the slope measurements and drainage of the site and what you may need to do to make it suitable for a playground.
- Nearby hazards: Are there busy roads, bodies of water or other potential dangers near the play site? If so, think about how you’ll contain the children in the playground to keep them safe.
- Sun exposure: Some playground surfaces, like bare metal slides, absorb heat. Try to place play equipment away from direct sunlight as much as possible or in the shade. If you are not able to position playground equipment away from the sun, save room in your budget for shade structures.
- Vegetation: If there are trees or vegetation near the site, think about how you can incorporate them into your playground. Trees can be an attractive and essential source of shade. Make sure there aren’t any overhanging limbs that might get in the way, and remove any plants that may be considered hazardous.
- Surrounding amenities: Is it possible to place the playground near existing amenities such as a parking area, restrooms or bike path? Selecting a site that’s conveniently located near amenities makes more sense than installing the playground in a faraway spot.
Step 4: Create a Playground Equipment Checklist
A great playground offers a variety of equipment and challenge levels, so children of all ages and abilities can play. Since there are many options to choose from, it helps to create a playground equipment checklist, which should include the pieces you don’t want to leave out. When selecting playground essentials, try to cover all the areas of play, such as:

- Physical play: Kids need at least an hour a day of physical activity, and your playground should help make that happen. Classic equipment like slides, swings and climbers allow kids to build muscle, burn calories and develop motor skills. They also help kids strengthen their social skills as they learn to take turns, maintain boundaries and play harmoniously. A commercial playset and swing set cover all the basics. Depending on your goals, you might also install a game court and basketball hoops to add competitive fun the whole family can enjoy.
- Sensory play: Children learn about the world and their bodies through their senses. Try to include equipment that provides a range of sensory experiences for children of various ages and abilities. Incorporate bright, contrasting colors and unique textures, shapes and sizes where you can. You might consider choosing a playset that includes activity panels and musical features to help kids develop their senses.
- Imaginative play: Imaginative play is important because it allows kids to express their emotions and develop social skills like empathy and communication. Your playground should spark the imagination and inspire kids to act out their favorite stories or play make-believe. Colorful and adventurous playground equipment like forts, tunnels, bridges, slides and climbers can encourage kids to pretend they are in a distant land on an important mission.
- Inclusive play: An inclusive playground is one that allows kids of all abilities to play together. Equipment such as ground-level activity panels or accessible ramps allow children with physical disabilities to play next to their peers. Provide independent play experiences and quiet spaces to help children with autism spectrum disorder feel comfortable as well. An inclusive playground ensures all kids get to benefit from playtime.
You’ll also want to think about the different age groups and what’s appropriate for each. That way, kids can play safely and get the stimulation they need to develop their minds and bodies. For example, according to the U.S. Consumer Product Safety Commission (CPSC), age-appropriate playground equipment might include:
- Toddler (ages 6 to 23 months): Climbing equipment under 32 inches high, ramps, spring riders and bucket seat swings
- Preschool (ages 2 to 5): Rung ladders, stairways, tire swings and merry-go-rounds
- School-age (ages 5 to 12): Belt swings, sliding poles, a variety of climbers and spiral slides
Step 5: Consider Complementary Items
Every playground needs site amenities so kids have a place to rest, and caregivers can sit comfortably as they keep an eye on little ones. Consider the type of complementary items you would like to have at your playground, and add them into your design and budget. These might include:
- Benches
- Tables
- Trash receptacles
- Drinking fountains
- Bike racks
- Accessible pathways
- Shade structures
Step 6: Determine Surfacing Needs
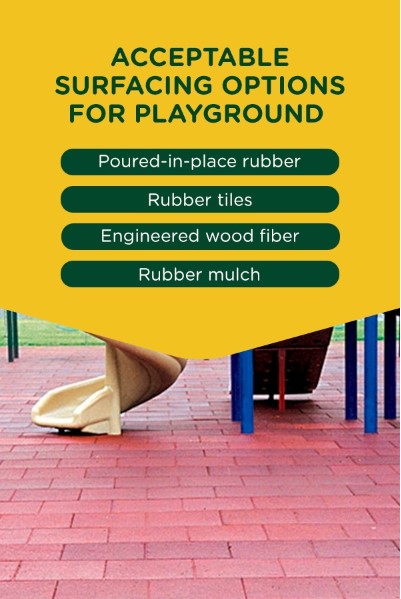
Shock-absorbing surfacing materials are critical for cushioning falls and preventing severe injuries at your playground. The surfacing can also make the difference between an accessible playground and one that isn’t. According to the CPSC, acceptable playground surfacing is any material that meets standard ASTM F1292 and is ADA-approved. Examples of acceptable surfacing options include:
- Poured-in-place rubber
- Rubber tiles
- Engineered wood fiber
- Rubber mulch
Step 7: Design Your Playground
Once you’ve determined everything you wish to include in your playground, it’s time to create a detailed design, so you can see how the finished product will look. You’ll use the information you gathered from your site evaluation to help you plan an accessible and spacious layout. The final drawing of your playground should include the placement of the equipment and site amenities, use zones, access points, landscaping and other features you’d like to add.
Are you worried about your drawing abilities? You don’t have to complete the design process alone, and your equipment vendor should help you through each stage. For example, at Superior Play Systems®, we offer free design services to help you plan your perfect playground according to your needs.
Step 8: Prepare the Site
How to prepare the site for installation depends on your needs and its current condition. If you have old playground equipment that will no longer be of use, you’ll need to remove it during this step. If the undesired equipment is still in good condition, consider donating it to another school or community center. You might also be able to recycle or sell unwanted materials.
During this phase, you’ll also need to address any drainage or soil issues and ensure the ground is stable. Call your local utility companies to make sure you won’t be digging into water, gas or power lines.
Step 9: Install the Playground
After your site is ready to go and you’ve ordered the equipment, it’s time for installation. To install playground equipment, you must follow all of the manufacturer’s instructions precisely to ensure secure anchoring and proper assembly. Hire a professional to inspect the newly installed playground for safety.
At Superior Play Systems®, we offer commercial playground installation services and over 20 years of experience. Let us know when and where you need your playground up and running, and our installation team will get the job done quickly and professionally.
Step 10: Maintain the Playground
After you’ve installed the playground and had your grand opening, there’s still more work to do. Playgrounds require regular maintenance to keep them safe and hazard-free. The manufacturer who designed your playground equipment should provide maintenance instructions and recommended inspection schedules. Generally, the more the playground is used, the more often it will need maintenance. To show you what to expect, the CPSC recommends checking for the following issues regularly:
- Broken equipment and missing or loose hardware
- Trash and hazardous debris
- Loose anchoring
- Displaced or damaged surfacing
- Insect damage
- Vandalism
- Rusted components
- Pooled water
- User modifications
- Snow or ice
Any needed repairs should be made as soon as possible.
Start Planning Your Commercial Playground Today
The best part of planning a playground is knowing the joy it’ll bring the kids in your school or community. Creating a commercial playground planning checklist can be a great place to start, but it’s worth reaching out to professionals to help you turn your dream into a reality.
At Superior Play Systems®, it’s our mission to provide customers with the highest-quality playground equipment and the most innovative designs in the industry. As The Most Trusted Name in Play®, we are proud to support our customers throughout every step of the process and beyond. For more information about our playground equipment and services, please contact us today or visit a showroom near you.