Table Of Contents:
- Understanding In-Ground Basketball Hoops
- Factors to Consider When Buying a Basketball Hoop
- What Impacts Basketball Hoop Installation Cost?
- DIY Basketball Goal Installation
- Hiring Professionals for Basketball Hoop Installation
- Why Choose Superior Play Systems® for Your Basketball Hoop Installation
- FAQs On Basketball Hoops Installation
- Conclusion
Key Takeaways:
|
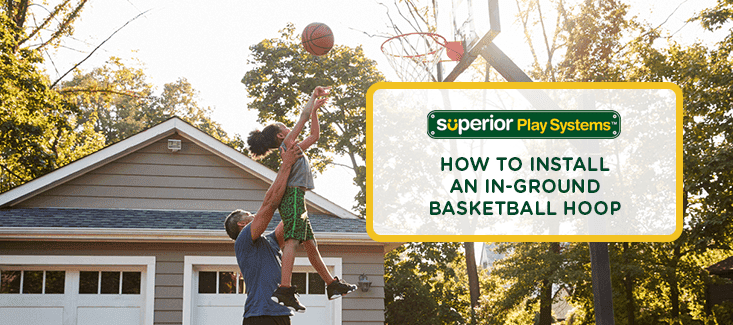
If you and your family love basketball, you may be dreaming of having your own hoop right in your yard. There are several different types of basketball hoops available, but an in-ground system offers the most stability and professional-level play. Here's everything you need to know when shopping around for a basketball hoop, how to do an in-ground basketball hoop installation, what the DIY process involves, and when hiring professionals may be the better choice.
Understanding In-Ground Basketball Hoops
In-ground basketball hoops are set into concrete for a permanent installation. Compared to portable basketball goals, they offer:
- Safety & stability
- Professional feel
- Durability
- Better performance for serious players
Many families prefer adjustable in-ground hoops to lower and raise the rim as kids grow and skills develop.
Factors to Consider When Buying a Basketball Hoop
When you're looking to buy a basketball hoop for your home, there are many things to consider, including where you'll install your basketball hoop and what type you'll need. A basketball hoop can be a big purchase and a big decision for your property, so you'll want to make sure you get the best kind for your family and install it in the best location. Here are some of the most important things to think about before you buy your basketball hoop:
1. Choosing a Seller
An in-ground basketball hoop is a large purchase, so you'll want to make sure you choose the right seller. The best sellers are those that offer post-purchase support such as installation and customer care. Superior Play Systems® is the safest and most trusted name in play and offers high-quality in-ground systems from PROformance Hoops®. When you purchase your basketball hoop from us, we'll work with you to provide a seamless installation process that gets your family on the court in no time.
2. Location
One of the most important factors to consider is selecting the location for your new basketball hoop. The most popular choice for a basketball hoop placement is in a driveway, but you should make sure that you have a level driveway, as it's much harder to play when the driveway is on an incline. If you have a larger backyard and enough room in the budget, you may want to consider a dedicated area or even a full-size basketball court. Just be sure that you have a patio or paved area — a basketball doesn't just bounce in the grass. The hoop should not be hanging over the street to keep players safe. It's also a good idea to check for any local and neighborhood ordinances or homeowner's association rules for any restrictions on basketball hoop installation or placement.
3. Backboard Size
The size of the backboard on a basketball hoop can affect the shot opportunities into the hoop, and generally, bigger is better here. However, you'll want to think about the size of your driveway or the place where you are installing the hoop. In a small driveway, a too-large backboard can overwhelm the space, or look out of place. Consider also the level of professionalism you want — if you have a child with aspirations for professional basketball, a 72-inch backboard is regulation size, and would give the best practice for real basketball courts. However, a larger backboard is more expensive and may not be necessary if the hoop's main purpose is for family recreation.
4. Height

You'll want to think about the height of the basketball hoop before you install it, making sure that it fits in with your location of choice. Professional regulation height is 10 feet for a basketball hoop, but just as with backboard size, you may want to go with an adjustable hoop or a shorter hoop if it's just for fun. You can also check out hoops with adjustable height so it can grow along with your kids. Also consider the size of the overhang — the distance between the pole and the backboard, making sure to have about 2.5 to 4 feet of overhang available.
5. Type of Pole
Selecting a pole for your basketball hoop may seem simple, but there are actually many choices available. Poles come in both round and square shapes, in sizes between 4 and 6 inches, and either as a single-piece or a multi-piece system. Poles are generally made of metal and are either painted or have a powder coating.
6. Net and Rim
Standard basketball setups have an 18-inch diameter rim, with hooks to attach the net. There are two main types of rims available for home basketball hoops — static and breakaway. A static rim stays in place without moving and is a great option for beginners or as a more economical choice, but it should not be used for dunking. If you anticipate some slam dunks on your home setup, a breakaway rim is the best choice. These rims include special springs that flex and absorb the force of the dunk. This protects the safety of the player, as well as the longevity of your basketball setup.
Once you've considered all of the options available for your basketball hoop, you can decide what is best for your family and your location. Next, it's time to purchase the basketball hoop setup and install it in your yard.
View PROformance Hoops® Installation Guides & Owner's Manuals Here
What Impacts Basketball Hoop Installation Cost?
Normally, the cost to install a basketball goal is less when you do the work yourself. On the other hand, using a professionally trained, experienced installer can improve the safety and performance of the hoop. There are different factors that can affect the basketball goal installation cost, including:
- The hoop type (fixed vs adjustable, backboard size, pole quality).
- The type of materials (concrete, gravel, anchor kit, rebar).
- The labor involved (if you're doing the work yourself vs a contractor).
- Ground conditions (rocky soil, sloped driveways, poor drainage).
- The tools used (rent or purchase).
- The cost of delivery (we install at your home within 60 miles of our store locations).
DIY Basketball Goal Installation
If you're comfortable and confident with tools and physical labor, you may consider installing your in-ground hoop yourself. Below is the full process.
Step-by-Step DIY In-Ground Basketball Hoop Installation
You've done your research and found the right basketball hoop for your family — now it's time for the exciting part! Installing your basketball hoop can be a lot of work, but here, we will lay out all of the steps involved. You'll have your own basketball hoop up in no time and ready for the whole family to shoot some hoops! Consider this your step-by-step DIY basketball hoop installation guide:
Step 1: Choose Your Location and Call Before You Dig
As mentioned in the section on things to consider, one of the most important steps in the basketball hoop installation process is choosing the right location. You may have already picked the location where you want your basketball hoop, but since you'll need to dig a hole, it is a must that you Call Before You Dig (dial 811) to check for any utility lines. Ask your Superior Play System for more info.
Be sure that you've checked with any neighborhood ordinances or homeowner's association rules on the placement of your in-ground basketball hoop on your property. You should also read all the instructions and check for any manufacturer recommendations for your particular model before you start digging.
Step 2: Dig a Hole
You'll need to dig a hole where the pole for the basketball hoop will be located. Check with your manufacturer and your specific model for recommendations on how to dig the hole, and how big it should be. You can dig by hand with a shovel, or use an auger or other digging equipment. See the owner's manual for specific instructions.
Step 3: Pour the Concrete
Once you've dug the hole, you'll secure the basketball hoop pole in the ground with poured concrete. Some models simply have a single pole that you pour the concrete around. If this is the case, have someone — or two people — hold the pole level while another pours the concrete around it. More commonly, there is a rebar-mounted anchor that you'll set into the concrete after it's been poured. Either way, as you're pouring the concrete, make sure to regularly agitate it with a shovel to remove any pockets of air.
To finish off, smooth out the top of the concrete with a trowel, and make sure everything is level. Clean off any excess with a damp towel or sponge. Now, you'll have to leave the cement to dry for at least 24 to 48 hours. For the first few hours, keep checking the cement to make sure that the pole hasn't shifted and isn't leaning. Correct the pole if necessary and keep re-checking until the cement has hardened. Wait on the rest of the assembly until the cement has dried and hardened completely.
Step 4: Raise the Pole
If your basketball hoop setup is simply a pole in the cement, you can skip ahead to the backboard. But if your setup includes a mounting anchor, it's time to assemble and raise the pole. Each model is a little different, so be sure to follow the directions for your specific unit. If you have an adjustable height type of basketball hoop, you'll assemble the lift mechanism and support arms according to the directions.
The post will likely be very heavy and may require a few people to lift it into place. Take any necessary safety precautions, and have your team lift up the pole so that it matches up with the anchor piece in the cement. Make sure that the post is level, and use the bolts to secure it into place. Leveling nuts should also be a part of the setup — adjust these as necessary to make the pole completely level.
Step 5: Attach the Backboard
In some basketball hoop setups, the backboard is attached before the pole is raised, but with many upscale models, you'll attach it after the pole is secured. Note that the backboard is also generally very heavy, and it may take several people working together to lift it up and get it installed. Make sure you have a few extra helpers around and take precautions for safe lifting.

Have several of your helpers lift the backboard up in place to the support arms, while another person secures it to the support mount. Each model is different, but there may be other support arms or cross braces to attach at this point. Follow the directions to get all of the right parts securely in place.
Step 6: Install the Rim and Net
When the backboard is fully attached, it's time to add the basketball rim and net. The rim will simply get bolted to the backboard in place. If you've opted for a breakaway rim, there may be some extra assembly required. With the rim attached, you can then loop the net around each of the hooks on the rim to have your net fully installed.
Step 7: Finishing Touches
By this point, your basketball hoop is almost ready to play! There are just a few extra steps to fully finish and customize your setup, some of which are optional. Some upscale models have extra padding that you can attach around the corners of the backboard, and around the pole. These are generally optional touches, but can ultimately protect the safety of any players, preventing bumps and bruises, or other injuries when accidentally bumping into the basketball hoop.
If you have an adjustable height basketball hoop, you can now adjust to the desired height for your family. It may be necessary first to place it at the regulation 10 feet so that you can mark the height on the pole or use the provided height stickers. Measure the height of the rim to check for accuracy. Now it's ready to adjust to whatever height you want to use — with the height stickers, it's easy to see at a glance where to adjust the mechanism.
If you have any additional accessories, such as court lighting, now is the time to install these. Follow the manufacturer's instructions for any accessories to get them installed properly. Depending on the size of the area where you install your hoop, you may want to paint court lines on the pavement. This is totally optional, but if you choose to paint lines, pressure wash the area first to ensure you have a clean surface for the paint to adhere to. Measure out where the lines need to be and mark them off with painter's tape. Paint in your lines and remove the tape. Now you're truly ready with your very own basketball court! Gather up the family and get ready to play!
Pros & Cons of DIY Basketball Goal Installation
| PROS | CONS |
| ✔ Lower installation cost | ✖ Labor-intensive and time-consuming |
| ✔ Great option for those with experience | ✖ Requires multiple tools |
| ✔ Full control of the process | ✖ Risk of errors (like a crooked pole) |
| ✔ Flexible timing | ✖ Concrete mistakes are hard to fix |
| ✖ No professional warranty on workmanship |
DIY Basketball Goal Installation Cost Estimate
DIY basketball goal installation costs also include:
- Concrete: $60–$120
- Gravel: $15–$30
- Hardware or anchor kit: often included with the hoop
- Tool rental (optional): $30–$75
Total average DIY cost: $100–$250 (not including hoop price)
Hiring Professionals for Basketball Hoop Installation
If you prefer a smooth, stress-free process, hiring experts is the best solution. We offer delivery and installation within 60 miles, making it even more convenient for homeowners.
What Does Professional In-Ground Basketball Hoop Installation Cover?
- Free yard check
- Appropriate hole depth and diameter
- Specialized digging tools
- Accurate leveling of the anchor
- Professional concrete work
- Assembly of the backboard, rim, and pole
- Final safety and stability check
- Complete clean-up
- Workmanship warranty
The outcome: safer, stronger, longer-lasting.
Why Should You Have a Professional Install Your Basketball Hoop?
Installing an in-ground basketball hoop can be more challenging and time-consuming than expected.
- DIY installation often requires specialized tools (like augers or backhoes) and can take two full days or more.
- Mistakes or delays can significantly extend the project timeline.
- A professional installation saves you time and hassle.
- We offer quality hoops and "white-glove" professional installation.
- Our team ensures a prompt, safe, and correct setup.
- You'll get to playing faster with minimal effort and worry.
Why Choose Superior Play Systems® for Your Basketball Hoop Installation
If you're shopping around for a basketball hoop for your family, come to Superior Play Systems® and experience the best in expertise and customer service. Our experts can help you every step of the way, from selecting the right equipment for your needs to scheduling professional white-glove installation services. To get started, contact Superior Play Systems® today — we can answer any of your questions and help you find the right basketball hoop for your family. Shop our equipment online or use our search tool to find the closest showroom where you live. Come experience our top-quality equipment and superior customer service in person!
Frequently Asked Questions
How Long Does It Take To Install An In-Ground Basketball Hoop?
Most DIY installations take about two days due to digging, concrete curing, and assembly. Professional installation is usually completed faster.
How To Maintain Your In-Ground Hoop After Installation?
To help your in-ground basketball hoop age gracefully and last for years, you should perform a few simple maintenance checks regularly.
First, inspect the hardware often and tighten any loosened nuts or bolts. To keep the pole and backboard looking good, clean them with mild soap and water. You must also touch up any chips in the paint immediately to prevent rust.
For the playing components, inspect the rim closely to ensure it is still level and replace any worn nets. Keep the height-adjustment system clean and lubricated so it operates smoothly.
Finally, remember basic safety and seasonal precautions: shovel off snow during winter, and do not hang on the rim at any time. Applying this simple care will keep your hoop in great condition for a long time.
Do Adjustable In-Ground Basketball Hoops Require Special Installation?
Yes. Adjustable in-ground basketball hoops need a more precise installation because of their heavier build and height-adjustment system. They usually require a deeper concrete base and careful leveling. You can DIY it, but most homeowners choose professional installation from Superior Play Systems for accuracy and safety.
Do The Basketball Hoops Come With A Warranty?
Yes! Most of our basketball hoops have a manufacturer’s warranty.
PROformance Hoops systems offers warranty protection on the structural components to the original owner, as long as the system was properly installed and the hoop is a part of its intended use. Padding and other components may also have some limited warranty.
It does not cover normal wear, misuse, or improper installation.
We recommend that you review the owner’s manual that comes with the product; a full description is documented in those manuals. And as always, if you have any questions, please feel free to reach out to us for support!
Conclusion
Installing a basketball hoop can be an incredible way to bring the court home. Regardless of whether you choose to do it yourself or hire us to deliver and professionally install your hoop, it is critical to consider your budget, your skillset, and what your long-term goals are.
Doing it yourself can save money, but it will require your time, effort, tools, and patience.
So, are you ready to jump in? Reach out to us at 888-762-9464 for a free assessment and quote to help get your basketball dreams off the bench!
Buy In-Ground Basketball Hoops Now!
